http://www.amazon.com/gp/aw/d/B002N6VHXI/ref=mp_s_a_1_1?qid=1440444646&sr=8-1&pi=AC_SY200_QL40&keywords=zoeller+507-0008&dpPl=1&dpID=21YVPf5QdPL&ref=plSrch
It's both a primary and backup. Not cheap, but well worth it.
So I'll give a fairly in detail installation post. Scale of 1-10, I would say this was a 3. It's not difficult at all, but you do need some basic DIY abilities. Took me about an hour to install, but would have been faster if I didn't take so many pictures. Ha.
So begin by unscrewing the bolts that hold the cover on and unplug. Clearly don't do this if you recently had a lot of rain.
Next I just unscrewed the coupling below the check valve and just removed the whole unit.
From there, unscrew the threaded connection that went into the old sump.
Unscrewed.
I next bailed out some water at the bottom of the pit to give myself a clearer view. This is a plastic pit, there should be no debris in the pit, but there was probably 3/4" of rock from construction in the bottom. I removed all of this. So even if you don't plan on replacing your pump, at least check for debris so you aren't burning out your current pump.
Next I measured from the floor to the top of the new sump pump pipe. The Zoeller is 18", but that's irrelevant. I simply used a paint stirrer and marked it, that way I wasn't getting a good ruler mucked up.
I then reinstalled the discharge pipe. Then simply stuck the paint stirrer in the pit and transferred the measurement onto the discharge pipe.
Removed the discharge pipe and then cut. I prefer to use a miter saw. I tape where I cut to keep it cleaner, grip the pipe tight, then do a slow cut. See, perfect cut!
Then put back in discharge and put new sump in to make sure my measurement was right.
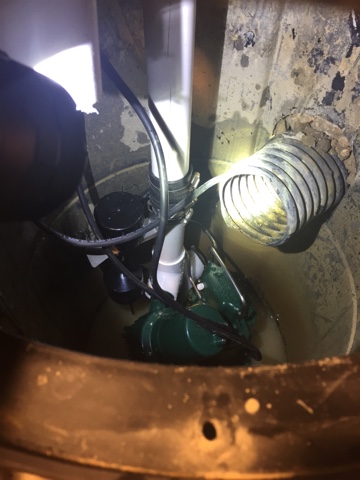
Removed the discharge again, then slipped the discharge through the plate cover, and then secured the discharge to the sump with the rubber coupling that's included. Here's how it looked.
Then drop the whole unit into the pit and then secure the discharge to the check valve.
This took me maybe 30 mins.
From there I ran a bunch of tests to make sure the primary worked.
I then hooked up the battery and the charger and ran through those tests. I still have to build a stand/shelf for the battery and charger. We bought a deep cycle marine battery from Sam's Club for $80.
And here's the underwhelming little baby original pump.


Well, figured it was time to install a backup sump pump. We had a scare last week when our power went out and the water got to within 5" to the ... esumppump.blogspot.com
ReplyDelete